


Tuesday, March 29, 2011
Hearts of Spring
This tutorial was written by Brunette on March 29th 2011.
Any similarity to any other tutorial is purely coincidental.
Do not copy and paste my tutorials or claim as your own you may link to them for group challenges.
You'll need a tube of choice I am using the cute art of Pinuptoons you can purchase his art to use for tags at CDO. Although mine was purchase at CILM when it was open.
Font of choice
Eye Candy 4000 - Gradient Glow
A kit of choice I am using a gorgeous collab kit by the wonderfully talented girls over at Pimp my tags with Scraps called Spring Love you can get it here.
Ready?
Let's get started!
Open up a new canvas 700x700 we can always re-size/crop later.
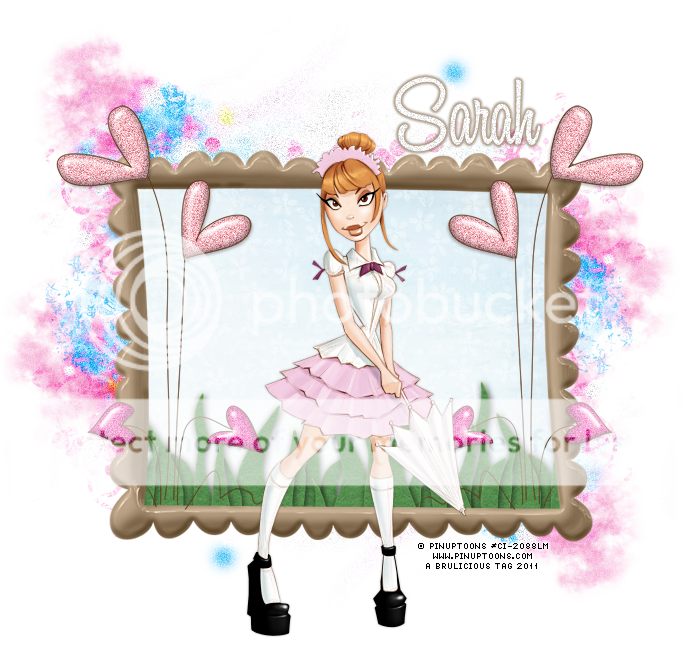
From Sarah's portion of the kit open up frame 3 copy and paste it as a new layer onto your canvas re-size it a little so its not too big and takes up too much of the tag
.
Take your magic wand and select inside the frame then go to selections-modify-expand by 3 then open a paper of choice I used paper 8 from the kit. Selections-invert and hit delete, make sure this layer is UNDER the frame layer. I also used the grass element from the kit placed it under the frame layer then used my eraser tool to erase what was over the sides of the frame. Make sure this layer is UNDER the frame layer as well.
Take your magic wand and select inside the frame then go to selections-modify-expand by 3 then open a paper of choice I used paper 8 from the kit. Selections-invert and hit delete, make sure this layer is UNDER the frame layer. I also used the grass element from the kit placed it under the frame layer then used my eraser tool to erase what was over the sides of the frame. Make sure this layer is UNDER the frame layer as well.
Next I added the grow with love element from the kit moved it to the left deleted the line that went along the bottom and over the frame to make it look like it was in the frame, then duplicated it and mirrored placing it on the other side.
I used splatter 2 from the kit pasted it as a new layer and moved it all the way to the bottom of the layer palette. Dupilcate, mirror and flip.
Now add your tube and a drop shadow shown in the screen shot below.

Now in a font of choice add your name with a gradient glow and a drop shadow. Settings I used shown in the screen-shot below.


Finally add your copyright and license number if applicable save as png or jpeg whichever you prefer and we're done!
I hope you enjoyed this tutorial and found it easy to follow.
Subscribe to:
Post Comments (Atom)


0 comments:
Post a Comment