


Showing posts with label Keith Garvey. Show all posts
Showing posts with label Keith Garvey. Show all posts
Tuesday, November 3, 2015
Tags and Snags with Jackie's Jewels Captivating Shadows Kit!
Whew its been awhile huh?!? Goodness, my mojo had flew the coop, I am slowly trying to work my way back!!
Today I have for you two tag show off along with some snags with one of the tags!
I used a GORGEOUS kit by none other than Jackie's Jewels!
I am using her Captivating Shadows kit which you can purchase HERE along with her other amazing kits!
I used the stunning art of Keith Garvey for both tags!
Here is tag 1
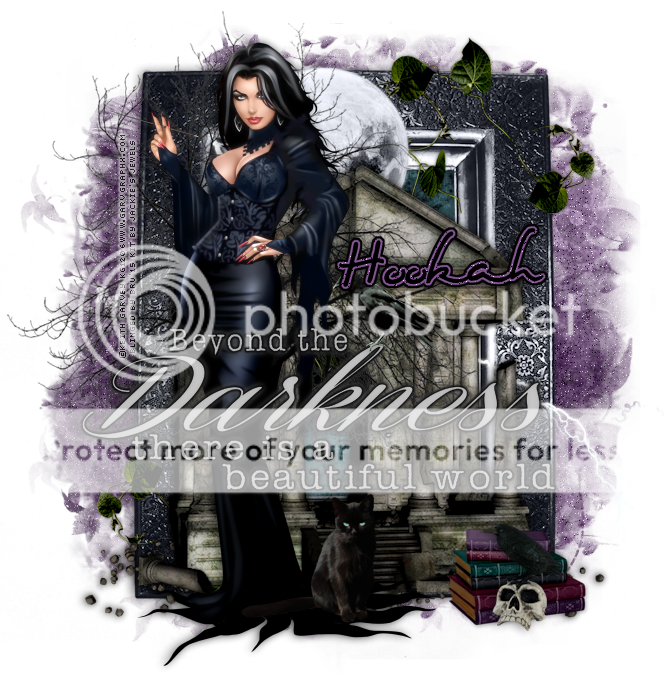
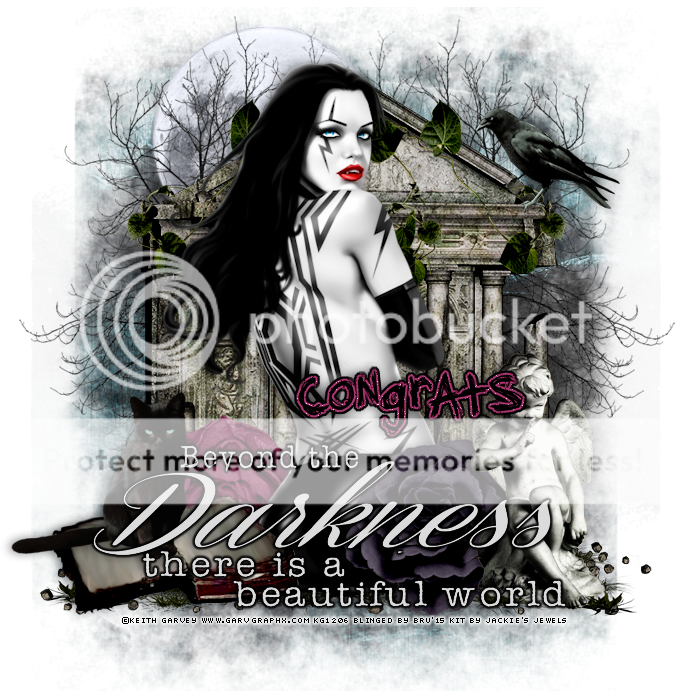
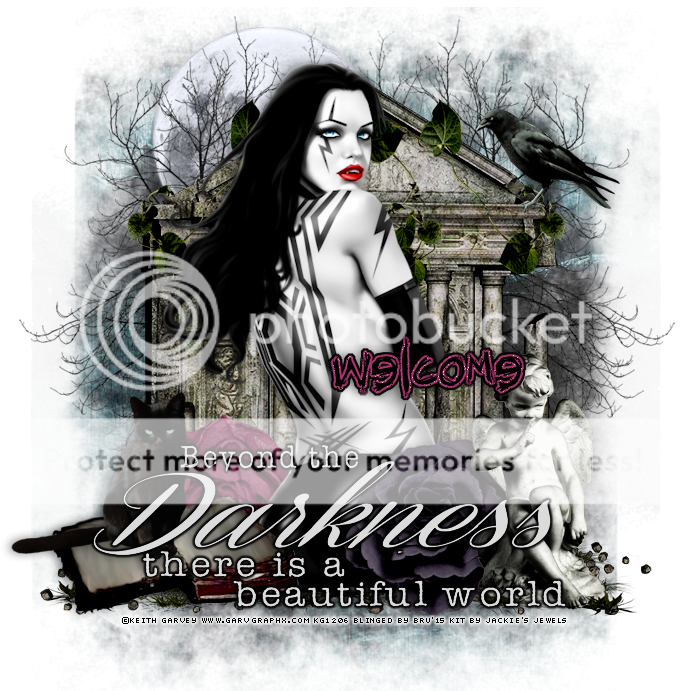
Here is tag 2 along with some snags!
*Please right click to view full size and to save to your computer*

Snags!


Thanks for stopping by!
Tuesday, March 19, 2013
Snuggle Bunny
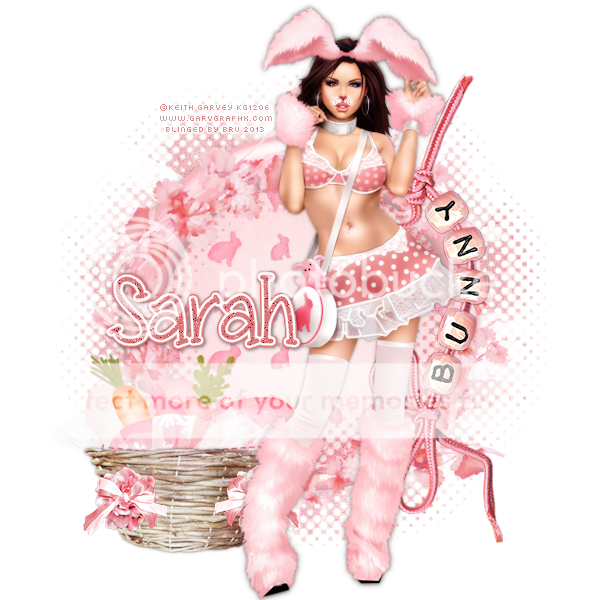
*Click the tag for full view*
This tutorial was written by Brunette on March 19th 2013.
Any similarity to any other tutorial is purely coincidental.
Do not copy and paste my tutorials or claim as your own you may link to them for group challenges.
What you'll need:
You'll need a tube of choice I am using a gorgeous tube by Keith Garvey.
Which you can purchase at his store HERE.
A gorgeous PTU kit by Designs by Sarah called Snuggle Bunny.
Which you can purchase this lovely kit HERE.
This tutorial was written by Brunette on March 19th 2013.
Any similarity to any other tutorial is purely coincidental.
Do not copy and paste my tutorials or claim as your own you may link to them for group challenges.
What you'll need:
You'll need a tube of choice I am using a gorgeous tube by Keith Garvey.
Which you can purchase at his store HERE.
A gorgeous PTU kit by Designs by Sarah called Snuggle Bunny.
Which you can purchase this lovely kit HERE.
Be sure to check out all her and the other designers awesome kits!
Eye Candy 400 - Gradient Glow
Fonts of choice - I am using a pixel font for the copyright and Miss Smarty Pants for the name.
Ready?
Let's get started!
Open up a new canvas 700x700.
Open up frame 1 from the kit copy and paste it as a new layer re-size it a little if you find it too big. Open up greenery 1 from the kit copy and paste it on top of the frame re-size it a little. Open up print 3 element from the kit copy and paste it below the frame layer. Take your magic wand and click inside the frame then go to selections-modify-expand by 3 add a new layer then copy and paste the paper INTO the selection. Select none.
Open up the bunny beads on string element copy and paste it as a new layer re-size it so it fits nicely and rotate it 90 degrees to the left and arrange it so that side on the frame.
Open up the basket element from the kit copy and paste it as a new layer re-size it so it fits nicely then arrange it near the bottom left of the tag. Now open up the lace element from the kit copy and paste it as a new layer re-size it so it fits nicely and move it below the basket layer. Keep re-sizing it so it looks like the lace is in the basket like a decoration. Open up egg 1, 2 and 3 copy and paste them as new layers re-size them so they fit in the basket move each of them below the basket layer arrange them so they show a bit outside the top part of the basket. Do the same with carrot 1 and two you can rotate them to your liking and place them where you'd like. I also used the bunny shape element.
Open up flower 4 from the kit copy and paste it as a new layer now we're going to re-size it so it fits on the basket like a decoration. Then open up bow 4 do the same but place it near the middle of the flower. Merge together then duplicate arrange this layer on the opposite side.
Copy and paste your tube as a new layer arrange and re-size to your liking. Duplicate it then change the blend mode to soft light then go to adjust-blur-gaussian blur set to 3. Add a drop shadow of H 0 V 0 Opacity 50 Blur 5.00 Color Black to the BOTTOM tube layer.
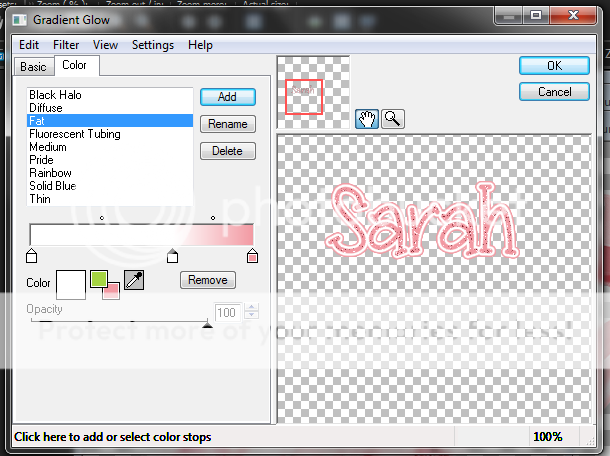
Now in a font and color of choice add your name I added some noise by going to adjust-add/remove noise-add noise then play with your settings to get something you like. I applied a gradient glow the settings that I used are shown in the screen-shot below. Now apply the same drop shadow you used earlier.
Eye Candy 400 - Gradient Glow
Fonts of choice - I am using a pixel font for the copyright and Miss Smarty Pants for the name.
Ready?
Let's get started!
Open up a new canvas 700x700.
Open up frame 1 from the kit copy and paste it as a new layer re-size it a little if you find it too big. Open up greenery 1 from the kit copy and paste it on top of the frame re-size it a little. Open up print 3 element from the kit copy and paste it below the frame layer. Take your magic wand and click inside the frame then go to selections-modify-expand by 3 add a new layer then copy and paste the paper INTO the selection. Select none.
Open up the bunny beads on string element copy and paste it as a new layer re-size it so it fits nicely and rotate it 90 degrees to the left and arrange it so that side on the frame.
Open up the basket element from the kit copy and paste it as a new layer re-size it so it fits nicely then arrange it near the bottom left of the tag. Now open up the lace element from the kit copy and paste it as a new layer re-size it so it fits nicely and move it below the basket layer. Keep re-sizing it so it looks like the lace is in the basket like a decoration. Open up egg 1, 2 and 3 copy and paste them as new layers re-size them so they fit in the basket move each of them below the basket layer arrange them so they show a bit outside the top part of the basket. Do the same with carrot 1 and two you can rotate them to your liking and place them where you'd like. I also used the bunny shape element.
Open up flower 4 from the kit copy and paste it as a new layer now we're going to re-size it so it fits on the basket like a decoration. Then open up bow 4 do the same but place it near the middle of the flower. Merge together then duplicate arrange this layer on the opposite side.
Copy and paste your tube as a new layer arrange and re-size to your liking. Duplicate it then change the blend mode to soft light then go to adjust-blur-gaussian blur set to 3. Add a drop shadow of H 0 V 0 Opacity 50 Blur 5.00 Color Black to the BOTTOM tube layer.
Now in a font and color of choice add your name I added some noise by going to adjust-add/remove noise-add noise then play with your settings to get something you like. I applied a gradient glow the settings that I used are shown in the screen-shot below. Now apply the same drop shadow you used earlier.

Finally add your copyright and license number if applicable save as png or jpeg whichever you prefer and we're done!
I hope you enjoyed this tutorial and found it easy to follow.
I would LOVE to see your results to any tutorials that you do, you can email results to me or post them on my page on face-book if you have a face-book account.
Monday, January 21, 2013
Glitter N Grease

*Click the tag for full view*
This tutorial was written by Brunette on January 21st 2013.
Any similarity to any other tutorial is purely coincidental.
Do not copy and paste my tutorials or claim as your own you may link to them for group challenges.
What you'll need:
You'll need a tube of choice I am using a gorgeous tube by Keith Garvey. Which you can purchase at his store HERE.
A gorgeous PTU kit by Lexi's Creationz called Glitter N Greasewhich you can find out where to purchase this kit HERE.
Be sure to check out ALL her other awesome kits!
Fonts of choice - I am using a pixel font for the copyright and Half toned back up for the name.
Mask of choice - mine is from Gem's Taggin Scraps which you can find HERE.
Leave some love when you download!
I used mask 21.
Ready?
Let's get started!
Open up a 600x600 canvas we can always re-size/crop later.
Open element 37 from the kit which is a frame. Copy and paste it as a new layer onto your canvas. Take your magic wand and click inside the frame then go to selections-modify-expand by 3 add a new layer then open up a paper of choice, I used paper 3 from the kit copy and paste it INTO the selection. DO NOT deslect yet! Take your tube a close up if it comes with one copy and paste it as a new layer arrange it to your liking then go to selections-invert and hit delete. Deselect then duplicate the tube in the frame and mirror it then merge down and change the blend mode to soft light.
Open up element 22 from the kit copy and paste it over the tubes in the frame but move it below the frame layer itself. Re-size it so it fits nicely and use your eraser tool to remove what hangs over the frame.
Open up element 27 from the kit copy and paste it as a new layer under the frame but above the other layers re-size and arrange to your liking.
Now we're adding stuff above the frame layer itself. Open up element 9 from the kit which is a cityscape, re-size and arrange so it fits nicely.
Open up your tube mine is not a full tube so I made it that she was at the bottom of the frame then added element 31 near the bottom re-sizing it so it fit nicely. Duplicate your tube layer then go to adjust-blur-gaussian blur set to 3 then change the blend mode to softlight. Apply a drop shadow of H 1 V 1 Opacity 50 Blur 5.00 Color Black to the bottom tube layer.
Open up a paper of choice I used paper 6 from the kit copy and paste it as a new layer below everything then apply your mask. Merge group then arrange it to your liking.
Back on the top layer add your name in a color of choice then go to selections-select all-float-defloat-modify and expand by 2 then add a new layer and flood fill with a color of choice then go to selections-modify and expand by 2 again add a new layer and flood fill with the same color you typed out your name in. Arrange that layer below everything other font layer and add the same drop shadow as you did earlier.
Finally add your copyright and license number if applicable save as png or jpeg whichever you prefer and we're done!
I hope you enjoyed this tutorial and found it easy to follow.
I would LOVE to see your results to any tutorials that you do, you can email results to me or post them on my page on face-book if you have a face-book account.
This tutorial was written by Brunette on January 21st 2013.
Any similarity to any other tutorial is purely coincidental.
Do not copy and paste my tutorials or claim as your own you may link to them for group challenges.
What you'll need:
You'll need a tube of choice I am using a gorgeous tube by Keith Garvey. Which you can purchase at his store HERE.
A gorgeous PTU kit by Lexi's Creationz called Glitter N Greasewhich you can find out where to purchase this kit HERE.
Be sure to check out ALL her other awesome kits!
Fonts of choice - I am using a pixel font for the copyright and Half toned back up for the name.
Mask of choice - mine is from Gem's Taggin Scraps which you can find HERE.
Leave some love when you download!
I used mask 21.
Ready?
Let's get started!
Open up a 600x600 canvas we can always re-size/crop later.
Open element 37 from the kit which is a frame. Copy and paste it as a new layer onto your canvas. Take your magic wand and click inside the frame then go to selections-modify-expand by 3 add a new layer then open up a paper of choice, I used paper 3 from the kit copy and paste it INTO the selection. DO NOT deslect yet! Take your tube a close up if it comes with one copy and paste it as a new layer arrange it to your liking then go to selections-invert and hit delete. Deselect then duplicate the tube in the frame and mirror it then merge down and change the blend mode to soft light.
Open up element 22 from the kit copy and paste it over the tubes in the frame but move it below the frame layer itself. Re-size it so it fits nicely and use your eraser tool to remove what hangs over the frame.
Open up element 27 from the kit copy and paste it as a new layer under the frame but above the other layers re-size and arrange to your liking.
Now we're adding stuff above the frame layer itself. Open up element 9 from the kit which is a cityscape, re-size and arrange so it fits nicely.
Open up your tube mine is not a full tube so I made it that she was at the bottom of the frame then added element 31 near the bottom re-sizing it so it fit nicely. Duplicate your tube layer then go to adjust-blur-gaussian blur set to 3 then change the blend mode to softlight. Apply a drop shadow of H 1 V 1 Opacity 50 Blur 5.00 Color Black to the bottom tube layer.
Open up a paper of choice I used paper 6 from the kit copy and paste it as a new layer below everything then apply your mask. Merge group then arrange it to your liking.
Back on the top layer add your name in a color of choice then go to selections-select all-float-defloat-modify and expand by 2 then add a new layer and flood fill with a color of choice then go to selections-modify and expand by 2 again add a new layer and flood fill with the same color you typed out your name in. Arrange that layer below everything other font layer and add the same drop shadow as you did earlier.
Finally add your copyright and license number if applicable save as png or jpeg whichever you prefer and we're done!
I hope you enjoyed this tutorial and found it easy to follow.
I would LOVE to see your results to any tutorials that you do, you can email results to me or post them on my page on face-book if you have a face-book account.
Friday, January 18, 2013
Dotty for YOU!
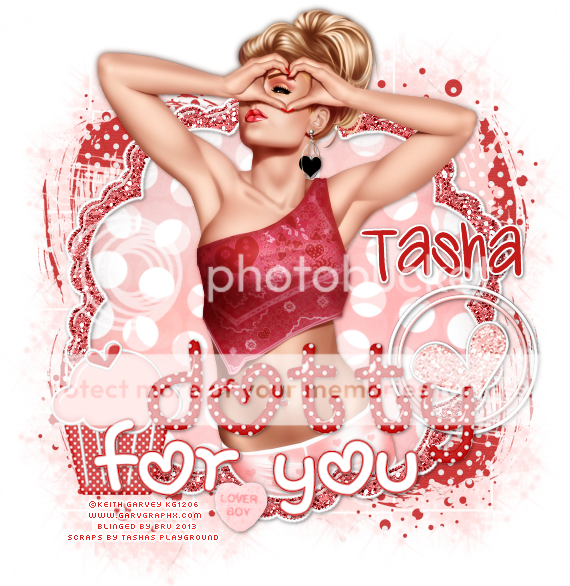
*Click the tag for full view*
This tutorial was written by Brunette on January 18th 2013.
Any similarity to any other tutorial is purely coincidental.
Do not copy and paste my tutorials or claim as your own you may link to them for group challenges.
What you'll need:
You'll need a tube of choice I am using a gorgeous tube by Keith Garvey. Which you can purchase at his store HERE.
A gorgeous PTU kit by Tasha's Playground called Dotty For You which you can find out where to purchase this kit HERE.
Be sure to check out ALL her other awesome kits!
Fonts of choice - I am using a pixel font for the copyright and Cutie for the name.
Mask of choice - mine is from Gem's Taggin Scraps which you can find HERE.
Leave some love when you download!
I used mask 16.
Ready?
Let's get started!
Open up a 600x600 canvas we can always re-size/crop later.
Open up frame 6 from the kit copy and paste it onto your canvas. Then go to selections-select all-float-defloat-modify and expand by 3 then add a new layer. Flood fill that layer with a color of choice then select none and move it below the frame add some noise the merge down and a drop shadow of H 1 V 1 Opacity 50 Blur 5.00.
Open up your tube since mine is a half tube I am going to have to make it look like shes coming OUT of the frame. So copy and paste your tube as a new layer and if yours is like mine read on. Arrange it to your liking then duplicate it move the duplicate below the frame layer, now you can use your eraser tool and erase what shows over the top of the frame if there is anything showing under the frame erase that too but be careful. Now duplicate your top tube copy again and change the blend mode to soft light and go to adjust-blur-gaussian blur of 3. Do the same thing for the tube layer that is below the frame layer. Add the same drop shadow as above to your bottom tube layer above the frame.
Take your magic wand and click inside the frame then go to modify and expand by 3 add a new layer and open up a paper of choice I used paper 9 and paste it INTO the selection then add another layer open up paper 10 and paste it INTO the selection then select none. Change the blend mode of the second paper layer to Luminance.
Open up paper 12 copy and paste it as a new layer arrange it so its below everything then apply your mask and merge group. Now I used the paint elements from the kit and arranged them to my liking. I changed the blend mode of the lighter one to screen.
Now we can go to the top of our layer palette. Open up the flair element from the kit copy and paste it as a new layer onto your canvas re-size so it fits nicely and arrange it so its to the right bottom part of the frame. Then add the same drop shadow as you did earlier in the tutorial.
Open up the candy heart element I used the one that said lover boy copy and paste it as a new layer. I placed it near the bottom left of the frame. Again apply your drop shadow.
Open up the cupcake element copy and paste it as a new layer re-size it so it fits nicely and move it to the left part of the frame. Apply your drop shadow.
Open up wordart2 copy and paste it as a new layer re-size it so it fits nicely arrange it near the bottom of the frame and apply your drop shadow.
Now in a font and color of choice add your name and arrange it to your liking, then go to selections-select all-float-defloat-modify-expand by 2 and add a new layer. Flood fill this layer with a color of choice I used white then select none. Move this layer below the original font layer and apply the same drop shadow you've used all along.
Finally add your copyright and license number if applicable save as png or jpeg whichever you prefer and we're done!
I hope you enjoyed this tutorial and found it easy to follow.
I would LOVE to see your results to any tutorials that you do, you can email results to me or post them on my page on face-book if you have a face-book account.
This tutorial was written by Brunette on January 18th 2013.
Any similarity to any other tutorial is purely coincidental.
Do not copy and paste my tutorials or claim as your own you may link to them for group challenges.
What you'll need:
You'll need a tube of choice I am using a gorgeous tube by Keith Garvey. Which you can purchase at his store HERE.
A gorgeous PTU kit by Tasha's Playground called Dotty For You which you can find out where to purchase this kit HERE.
Be sure to check out ALL her other awesome kits!
Fonts of choice - I am using a pixel font for the copyright and Cutie for the name.
Mask of choice - mine is from Gem's Taggin Scraps which you can find HERE.
Leave some love when you download!
I used mask 16.
Ready?
Let's get started!
Open up a 600x600 canvas we can always re-size/crop later.
Open up frame 6 from the kit copy and paste it onto your canvas. Then go to selections-select all-float-defloat-modify and expand by 3 then add a new layer. Flood fill that layer with a color of choice then select none and move it below the frame add some noise the merge down and a drop shadow of H 1 V 1 Opacity 50 Blur 5.00.
Open up your tube since mine is a half tube I am going to have to make it look like shes coming OUT of the frame. So copy and paste your tube as a new layer and if yours is like mine read on. Arrange it to your liking then duplicate it move the duplicate below the frame layer, now you can use your eraser tool and erase what shows over the top of the frame if there is anything showing under the frame erase that too but be careful. Now duplicate your top tube copy again and change the blend mode to soft light and go to adjust-blur-gaussian blur of 3. Do the same thing for the tube layer that is below the frame layer. Add the same drop shadow as above to your bottom tube layer above the frame.
Take your magic wand and click inside the frame then go to modify and expand by 3 add a new layer and open up a paper of choice I used paper 9 and paste it INTO the selection then add another layer open up paper 10 and paste it INTO the selection then select none. Change the blend mode of the second paper layer to Luminance.
Open up paper 12 copy and paste it as a new layer arrange it so its below everything then apply your mask and merge group. Now I used the paint elements from the kit and arranged them to my liking. I changed the blend mode of the lighter one to screen.
Now we can go to the top of our layer palette. Open up the flair element from the kit copy and paste it as a new layer onto your canvas re-size so it fits nicely and arrange it so its to the right bottom part of the frame. Then add the same drop shadow as you did earlier in the tutorial.
Open up the candy heart element I used the one that said lover boy copy and paste it as a new layer. I placed it near the bottom left of the frame. Again apply your drop shadow.
Open up the cupcake element copy and paste it as a new layer re-size it so it fits nicely and move it to the left part of the frame. Apply your drop shadow.
Open up wordart2 copy and paste it as a new layer re-size it so it fits nicely arrange it near the bottom of the frame and apply your drop shadow.
Now in a font and color of choice add your name and arrange it to your liking, then go to selections-select all-float-defloat-modify-expand by 2 and add a new layer. Flood fill this layer with a color of choice I used white then select none. Move this layer below the original font layer and apply the same drop shadow you've used all along.
Finally add your copyright and license number if applicable save as png or jpeg whichever you prefer and we're done!
I hope you enjoyed this tutorial and found it easy to follow.
I would LOVE to see your results to any tutorials that you do, you can email results to me or post them on my page on face-book if you have a face-book account.
Subscribe to:
Posts (Atom)


