


Showing posts with label Wicked Princess Scraps. Show all posts
Showing posts with label Wicked Princess Scraps. Show all posts
Friday, October 12, 2012
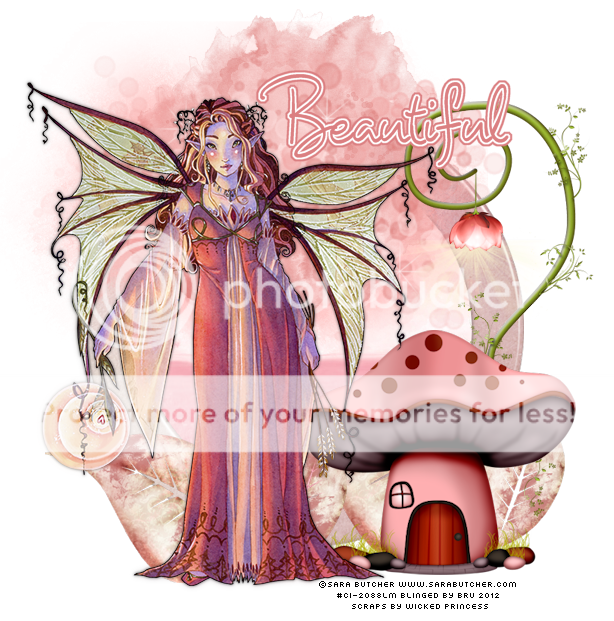
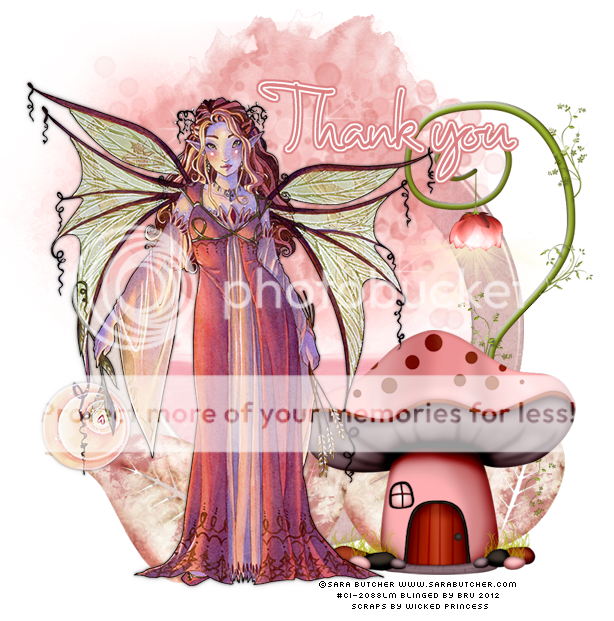
Magic Fairy

*Click the tag for full view*
This tutorial was written by Brunette on October 12th 2012.
Any similarity to any other tutorial is purely coincidental.
Do not copy and paste my tutorials or claim as your own you may link to them for group challenges.
What you'll need:
You'll need a tube of choice I am using a gorgeous tube by Terry Heuser. You can purchase at The PSP Project HERE.
Check out the rest of his beautiful artwork while you're there.
A gorgeous PTU kit by Wicked Princess Scraps called Magick In The Woods which you can purchase HERE.
Be sure to check out ALL her other awesome kits!
Fonts of choice - I am using a pixel font for the copyright and Allura for the name.
Mask of choice - mine is from Gems Taggin' Scraps which you can find HERE.
I used mask number 8.
Leave some love when you download!
Eye Candy 4000 - Gradient Glow
Ready?
Let's get started!
Open up a 700x700 canvas we can always re-size/crop later.
I like my tags BIG LOL.
Open up the door element from the kit copy and paste it as a new layer re-size it so it fits nicely.
Next take sign 2 from the kit copy and paste it as a new layer again re-sizing it so it fits nicely arrange it to the left of your door. Repeat these steps but using Tree 2 from the kit and arranging it to the right of your door.
Open up your tube copy and paste it as a new layer arrange it to your liking and add a drop shadow I used H 1 V 1 Opacity 60 Blur 4.00 Color Black.
Open up mushroom house 3 element from the kit copy and paste it as a new layer mirror it and arrange it near the left bottom of your tag of course re-sizing it so it fit there nicely. Add the same drop shadow as you did earlier.
Open up rock 2 element from the kit copy and paste it as a new layer mirror it and arrange ot ner the right bottom of your tag again re-sizing so it fit nicely along with the same drop shadow as earlier.
I added the fox from the kit on the rocks and squirrel 1 to the other side re-sizing them again so they fit nicely and you can add the same drop shadow if you'd like.
Open up the rainbow element copy and paste it as a new layer move it below the tube and the sign but make sure its above the tree, re-size it so it fits nicely. You can erase the little bit that you don't want showing but thats up to you.
Open up paper 8 from the kit and apply your mask then merge group. Arrange the mask to your liking.
Now in your font and color of choice add your name then apply a gradient glow my settings shown in the scree-shot below and the same drop shadow you've used all along.


Finally add your copyright and license number if applicable save as png or jpeg whichever you prefer and we're done!
I hope you enjoyed this tutorial and found it easy to follow.
I would LOVE to see your results to any tutorials that you do, you can email results to me or post them on my page on facebook if you have a facebook account.
Wednesday, September 19, 2012
Muted Love

*Click the tag for full view*
This tutorial was written by Brunette on September 19th 2012.
Any similarity to any other tutorial is purely coincidental.
Do not copy and paste my tutorials or claim as your own you may link to them for group challenges.
What you'll need:
You'll need a tube of choice I am using a gorgeous tube by Angela Newman. You can purchase this tube at The PSP Project HERE.
Be sure to check out all her other great stuff as well as other designers there!
A gorgeous FTU kit by Wicked Princess Scraps called Muted Love which you can download HERE.
Make sure to leave some love!
Be sure to check out all her other great kits while you're there!
Template by Elegant Inspirations which you can download HERE.
Make sure you leave some love when you download!
Eye Candy 4000 - Gradient Glow (Optional)
Penta - Dot and Cross
Xero - Fritilary
Fonts of choice - I am using a pixel font for the copyright and Desyrel for the name.
Ready?
Let's get started!
Open up the template then hit Shift+ D this will open the template on a whole new canvas. Close the original template file.
We're going to work on the template from the bottom upwards.
On the gray flower 2 layer selections-select all-float-defloat add a new layer now open up a paper of choice I used paper 11 from the kit copy and paste it INTO the selection. Close off the original flower layer. Now on your new flower layer go to selections-float-defloat-modify-expand by 2 add a new layer and flood fill with a color of choice I used white. Move this layer below the flower layer and add some noise settings of your choice and add a drop shadow I used H 2 V 2 Opacity 60 Blur 4.00 Color Black. Repeat these steps for the other gray flower layer.
On the Lil black circle 2 layer go to selections-float-defloat now open up a paper of choice from the kit I used paper 5 copy and paste it as a new layer arrange it to your liking then go to selections-invert and hit delete. Close off the original lil black circle 2 layer. Repeat these steps for the other black circle layer.
We're leaving the black rectangles as they are.
On dark grey square 1 and two add Xero Fritilary to them hit random on the settings until you get something you like.
On Grey rectangle 3 and 4 add penta dot and cross my settings shown in th screen shot below.

On the dark grey circle layer selections-select all-float-defloat now copy and paste your tube as a new layer I used a closeup that came with the tube. Arrange it to your liking then go to selections-invert and hit delete. Change the blend mode to Luminace L. Repeat this step for the other dark grey circle layer.
Now we're on the black circle layer. Open up the silver clock element from the kit copy and paste it as a new layer arrange it so its peeking out from behind the white circle layer a bit. If it doesn't show all the way around duplicate and mirror. Use your erase tool to erase what you don't want seen on both layers. Then open up the moon element from the kit copy and paste it as a new layer below the clocks you just added re-size it so it fits nicely and change the blend mode to Luminance L. Duplicate and mirror if it doesn't cover the circle fully.
On the white circle layer I just added some noise to it by going to adjust-add/remove noise-add noise then choose your settings.
Open up the boxes element from the kit copy and paste it as a new layer near the bottom right of the tag re-size them so they fit nicely.
Open up the sachet bag element from the kit copy and paste it as a new layer near the bottom left of the tag and re-size it so it fits nicely.
Open up the feather element from the kit copy and paste it as a new layer and move it up near the top left of your tag then re-size it so it fits nicely.
Open up the flower clip element from the kit copy and paste it as a new layer and move it up near the top right of the tag and re-size it so it fits nicely.
Now copy and paste your tube as a new layer then duplicate it and go to adjust-blur-gaussian blur set to 5 and change the blend mode to soft light. Add a drop shadow I used Loka's Software 3D shadow, settings shown below in my screen-shot.

Add your name in a font and color of choice then add a gradient glow my settings shown in the screen-shot below, then add drop shadow I used H 2 V 2 Opacity 60 Blur 4.00 Color Black.


Finally add your copyright and license number if applicable save as png or jpeg whichever you prefer and we're done!
I hope you enjoyed this tutorial and found it easy to follow.
I would LOVE to see your results to any tutorials that you do, you can email results to me or post them on my page on face-book if you have a face-book account.
Monday, August 13, 2012
Valentine Arrows
*Click the tag for full view*
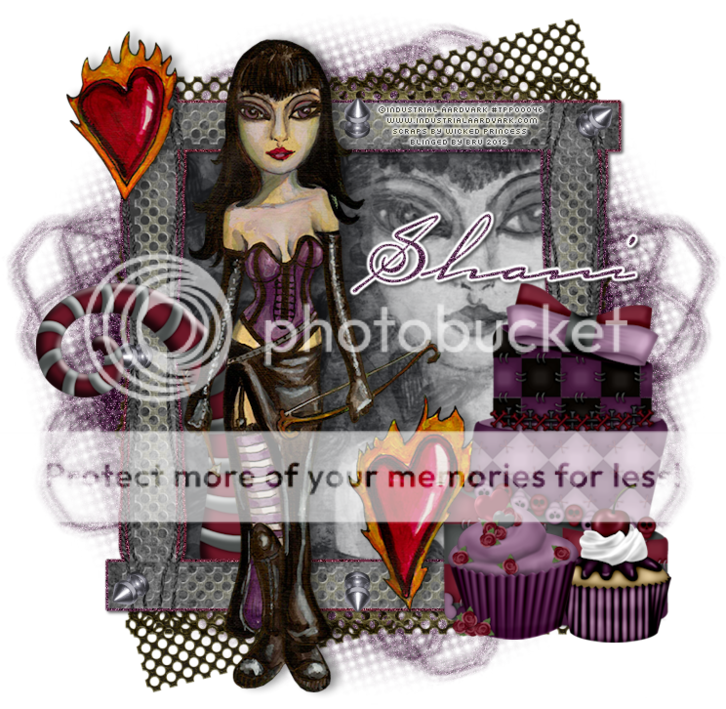
This tutorial was written by Brunette on August 13th 2012.
Any similarity to any other tutorial is purely coincidental.
Do not copy and paste my tutorials or claim as your own you may link to them for group challenges.
What you'll need:
You'll need a tube of choice I am using a gorgeous tube by Industrial Aardvark which you can purchase at The PSP Project HERE.
Be sure to check out all the other great artists there!
A cute kit by Wicked Princess Scraps called Valentine Arrows which you can purchase HERE.
This is an exclusive kit to that store and it matches the tube I used!
Fonts of choice - I am using a pixel font for the copyright and Carpenter ICG for the name.
Mask of choice - mine is by Chas from Creative Misfits HERE.
I used mask number 39 :)
Make sure you leave some love when you download!
Eye Candy 4000 - Gradient Glow
Ready?
Let's get started!
Open up a 700x700 canvas we can always re-size/crop later.
I like my tags BIG LOL.
Open up frame 2 from the kit copy and paste it as a new layer onto your canvas.
Open up a paper of choice I used paper 3 from the kit copy and paste it as a new layer onto your canvas below your frame layer. Now use your eraser tool to erase what is outside the frame. Take your tube mine came with a closeup copy and paste it as a new layer above the paper and use your eraser tool like you did for the paper. Gray scale your tube layer and change the blend mode to screen.
Now go back to your frame layer go to selections-select all-float-defloat-modify-expand by 3 add a new layer and flood fill with a color of choice then add some noise in psp go to Adjust-add/remove noise-add noise my settings are Random checked, Monochrome checked and at 36%. Add a drop shadow these are my settings
H 2
V 2
Opacity 60
Blur 4.00
Color Black
Open up the mess element from the kit copy and paste it as a new layer onto your canvas re-size it a little if you need to and move it below the frame layer. Arrange it so its sticking out at the top slighty then duplicate, mirror and flip it.
I used the metal studs on the frame itself, re-size them so they fit. They should fit just right on the frame.
I also used the cake and the two cucakes on the bottom right side of the frame. Re-size them so they fit there nicely.
I added the cane element from the kit re-sized it so it fit nicely mirrored and put it on the bottom left corner of the frame.
Copy and paste your tube as a new layer arrange it to your liking and add the same drop shadow as you did earlier.
Now open up a paper of choice I used paper 9 copy and paste it as a new layer onto your canvas arrange it so its below everything. Then add your mask and merge group. Arrange your mask layer to your liking I added some noise to this layer using the same settings stated earlier.
Add your name in your font and color of choice then add some noise I used the same settings as earlier. Then add your gradient glow settings that I used are shown in the screen shot below.


Finally add your copyright and license number if applicable save as png or jpeg whichever you prefer and we're done!
I hope you enjoyed this tutorial and found it easy to follow.
I would LOVE to see your results to any tutorials that you do, you can email results to me or post them on my page on face-book if you have a face-book account.
Saturday, July 28, 2012
Autumn Extras
I have some snags for you using the gorgeous art of Sara Butcher which you can purchase at CDO.
Along with a GORGEOUS kit called Synclair Skully, Skull Pixie Sister by the ever talented Wicked Princess which you can purchase at Whimsical Divas. Be sure to check out ALL her other gorgeous kits while you're there!
Enjoy!
*Click the tag for full view and saving*


Tuesday, July 24, 2012
Get out

*Click the tag for full view*
This tutorial was written by Brunette on July 24th 2012.
Any similarity to any other tutorial is purely coincidental.
Do not copy and paste my tutorials or claim as your own you may link to them for group challenges.
What you'll need:
You'll need a tube of choice I am using an awesome tube by Jussta which you can purchase at Indie Zine HERE.
Be sure to check out all the other great artists there!
A kick-ass FREE kit called Evil Ann and Andy by Wicked Princess Scraps which you can download HERE.
Be sure to check out ALL her other awesome kits!
Fonts of choice - I am using a pixel font for the copyright and Anything You Want for the name.
Mask of choice - mine is from weescottlass creations which you can find HERE.
I used mask number 219 you'll see on the right side they are bundled in bulk downloads :)
Ready?
Let's get started!
Open up a 700X700 canvas, we can always re-size/crop later.
I like BIG tags LOL.
Open up paper 1 from the kit copy and paste it onto your blank canvas then apply your mask and merge group. Duplicate this layer. Add a new layer flood fill with white add the same mask and merge group but move this layer below the other two. This just makes the other layers a little more noticeable.
Open up the ghost element from the kit copy and paste it as a new layer make sure you're at the top of all your layers at this point. Re-size it so it fits nicely and arrange to your liking and duplicate it.
Open up the tree from the kit copy and paste it as a new layer onto your canvas re-size it and arrange it to your liking.
Now we're going to take the cemetery scene from the kit copy and paste it as a new layer near the bottom of your tag I put mine off to the side because of how my tube was made. Re-size it to your liking.
Take the bloody hand-print element from the kit re-size it so it fits on the far right dark tombstone.
Copy and paste your tube as a new layer I moved mine below the cemetery scene since its not a full tube. Duplicate this layer change the blend mode to soft light and go to adjust-blur-gaussian blur at 3.
Take the bloody get out word-art from the kit re-size it so it fits nicely on your tag rotate it to your liking. It depends on where you placed it on your tag.
Add your name in your font and color of choice then go to selections-select all-float-defloat-modify and expand by 2 add a new layer flood fill it with white or a color of choice then add some noise by going to adjust-add/remove noise-add noise uniform checked, 50% noise and monochrome checked. DO NOT deslect yet go to modify and expand by 2 again add a new layer and flood fill with the color you used for your name move it below all the name layers and add a drop shadow.
Here are the settings I used
H 2
V 2
Opacity 60
Blur 4.00
Color Black
Finally add your copyright and license number if applicable save as png or jpeg whichever you prefer and we're done!
I hope you enjoyed this tutorial and found it easy to follow.
I would LOVE to see your results to any tutorials that you do, you can email results to me or post them on my page on face-book if you have a face-book account.
Saturday, June 9, 2012
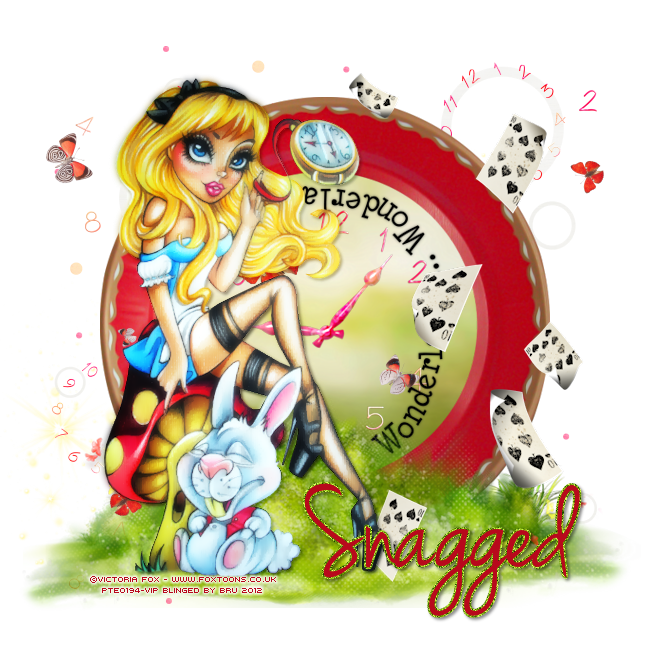
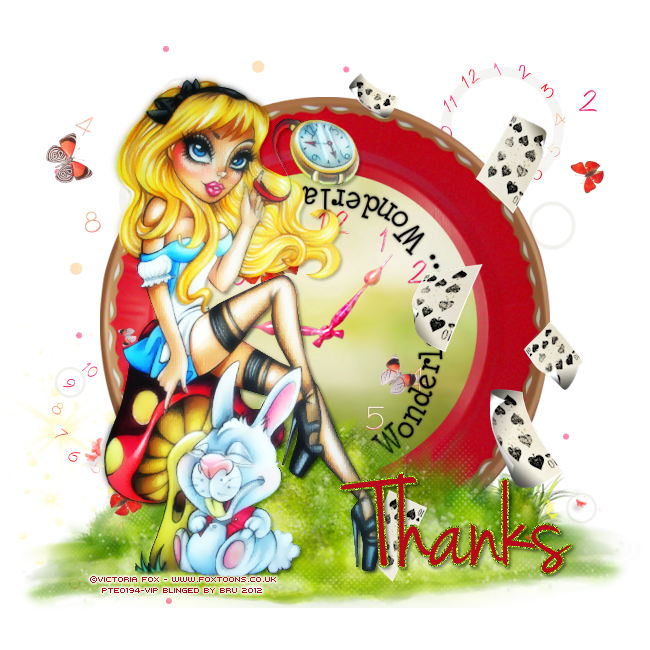
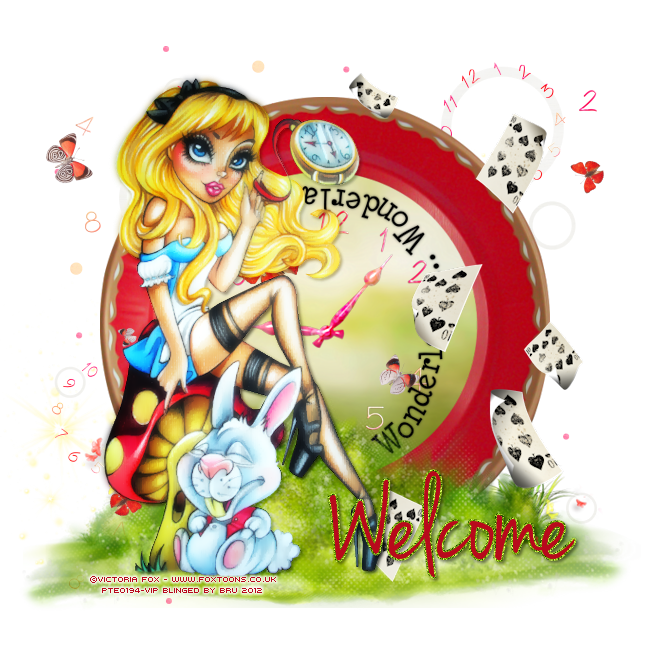
Alice

*Click the tag for full view*
This tutorial was written by Brunette on June 9th 2012.
Any similarity to any other tutorial is purely coincidental.
Do not copy and paste my tutorials or claim as your own you may link to them for group challenges.
What you'll need:
You'll need a tube of choice I am using an gorgeous tube by Charlotte Thomson which you can purchase at The PSP Project HERE.
Be sure to check out all the other great artists there!
A cute kit by Wicked Princess called Alice. You can purchase this kit at The PSP Project HERE.
Be sure to check out ALL her other awesome kits!
Fonts of choice - I am using a pixel font for the copyright and Walt Disney Script for the name.
Eye Candy 400 - Gradient Glow
Mask of choice - mine is from weescottlass creations which you can find HERE.
I used mask number 218 you'll see on the right side they are bundled in bulk downloads :)
Ready?
Let's get started!
Open up a 700X700 canvas, we can always re-size/crop later.
I like BIG tags LOL.
Open up the circle frame from the kit, copy and paste it as a new layer onto your canvas re-size it a little if you need to. Take your magic wand and click inside the frame then to go selections-modify-expand by 5 copy and paste a paper as a new layer I used paper 2 from the kit then go to selections-invert and hit delete, move this layer below the frame layer.
Making sure you're on your frame layer go to selections-select all-float-defloat-modify and expand by 3 add a new layer and flood fill with a color of choice. I used white and added some noise by going to adjust-add/remove noise-add noise then play with the settings to get something you like.
I also added a drop shadow with these settings:
H 2
V 2
Opacity 60
Blur 4
Color Black
H 2
V 2
Opacity 60
Blur 4
Color Black
Then repeat and change the H&V to -2 and move this layer below the frame but above the paper layer.
I used the grass element from the kit for the bottom part of the frame re-sized it a little to fit nicely. I also used the mushrooms and place them on the left of the grass re-sizing them too.
Open up the mushroom house element from the kit copy and paste it as a new layer onto your canvas, re-size it so it fits nicely and move it to the bottom right of the frame and grass.
Take the wonderland word-art copy and paste it as a new layer re-size it if you need to and I placed it in the inside part of the circle frame so its above the paper layer then used my eraser tool to erase what was left outside the frame. Then take the club element from the kit copy and paste it in the same place re-size it a little and arrange it so its in the circle shape the word-art makes.
Now take another paper I used paper 7 from the kit copy and paste it as a new layer making sure its the bottom layer on your palette. Then add your mask and merge group. Arrange it to your liking duplicate if you need to so it makes the back of the frame covered.
Copy and paste your tube as a new layer and arrange to your liking. Duplicate it and change the blend mode to soft light.
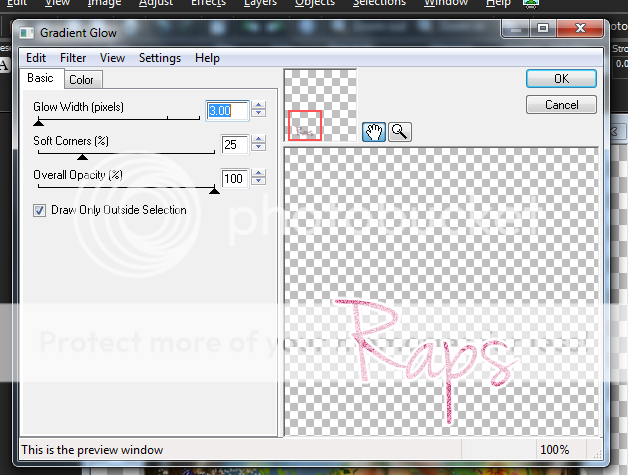
In your font of choice add your name and then add a gradient glow my settings shown below, then add a drop shadow my settings are the same as above except I didn't do the -2 for H&V. Change the blend mode of your text to Luminance L if you want it depends on where you place your text so this step is optional


Finally add your copyright and license number if applicable save as png or jpeg whichever you prefer and we're done!
I hope you enjoyed this tutorial and found it easy to follow.
I would LOVE to see your results to any tutorials that you do, you can email results to me or post them on my page on facebook if you have a facebook account.
I hope you enjoyed this tutorial and found it easy to follow.
I would LOVE to see your results to any tutorials that you do, you can email results to me or post them on my page on facebook if you have a facebook account.
Tuesday, May 15, 2012
Patches

*Click the tag for full view*
This tutorial was written by Brunette on May 15th 2012.
Any similarity to any other tutorial is purely coincidental.
Do not copy and paste my tutorials or claim as your own you may link to them for group challenges.
What you'll need:
You'll need a tube of choice I am using an awesome tube by Time Thief which you can purchase at The PSP Project HERE.
Be sure to check out all the other great artists there!
Fonts of choice - I am using a pixel font for the copyright and bu De-boned for the name which you can download from HERE.
An AWESOME kit by Wicked Princess called Buried Treasure. Which you can purchase at The PSP Project HERE.
Be sure to check out ALL the other awesome stuff by her and the other designers there!
Mask of choice - mine is from Creative Misfits blog which you can find HERE.
Ready?
Let's get started!
Open up a 700X700 canvas, we can always re-size/crop later.
I like BIG tags LOL.
Open up the bunch of crates element from the kit copy and paste it as a new layer onto your canvas re-size it so it fits nicely and move it to the left a little. Now open up Barrell Pyramid element from the kit copy and paste that as a new layer onto your canvas and re-size it move it to the right a little. It doesn't matter if the two overlap we're going to add the tube and such anyway.
Open up the candlebra element from the kit copy and paste it as a new layer onto your canvas and re-size it so it fits nicely. Move it to the lower right of your tag.
Open up the pirate flag copy and paste it as a new layer re-size it and love it so its over the barrells and the crates.
Coin splatter 1 from the kit copy and paste that as a new layer re-size and move it below everything else, I erased what showed over the top and left it showing at the bottom.
Open up the treasure boxside copy and paste it as a new layer re-size it and move it so it sits on top of the crates.
Copy and paste your tube as a new layer arrange it to your liking. Mine had her hand sitting down so I used the compass from the kit placed it where her hand was and just used my eraser tool and carefully erased the parts of the compass where her hand and fingers are. So it looks like shes holding or leaning on the compass.
Open up paper 11 from the kit copy and paste it as a new layer onto your canvas move it below everything on your layer palette. Apply your mask and then merge group. I used my eraser tool and erased the bottom part of the masked layer that was showing but thats up to you.
In your font and color of choice add your name. I used black for mine then went to selections-select all-float-defloat-modify-expand by 2 add a new layer and flood fill with a color from your tag I used gold DO NOT deslect yet! Go to modify-expand by 2 again add a new layer and flood fill with the original font color then move it below all the other layers. I added some noise to my middle layer but thats up to you. Add a drop shadow, my settings are below.
H 0
V 0
Opacity 45
Blur 4.00
Color Black
Finally add your copyright and license number if applicable save as png or jpeg whichever you prefer and we're done!
I hope you enjoyed this tutorial and found it easy to follow.
I would LOVE to see your results to any tutorials that you do, you can email results to me or post them on my page on facebook if you have a facebook account.
Saturday, April 14, 2012
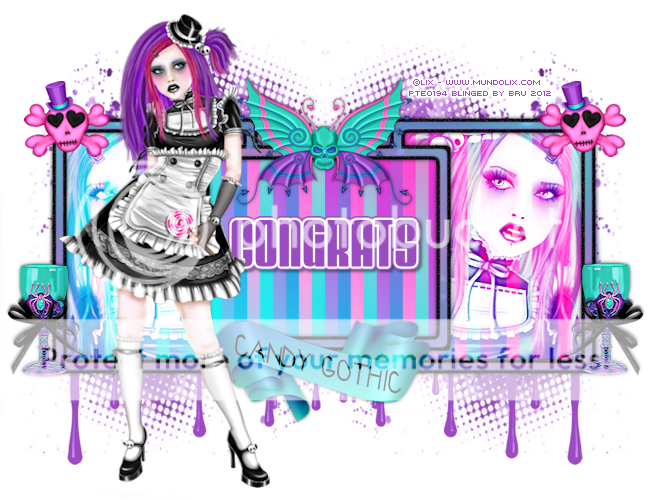
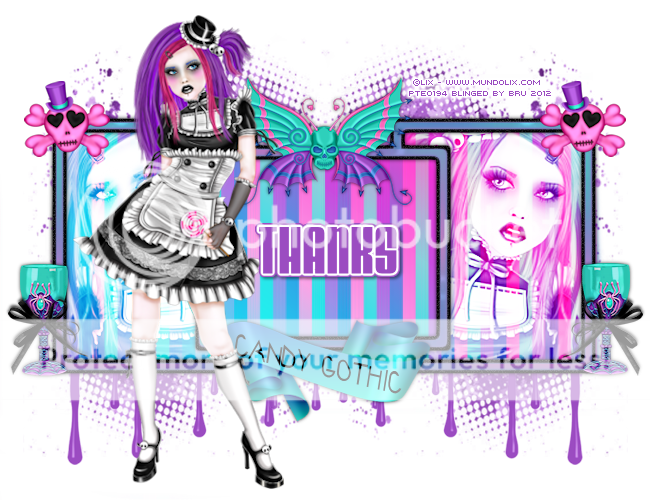
Candy Gothic Snags!
Here are some snags for you using a cute tube by Lix which is available at PSP Tubes Emporium along with a kickass kit by Wicked Princess Scraps called Candy Gothic which is available at her stores listed on her blog.
Enjoy!
*Click the tags for full view*

New Snags!
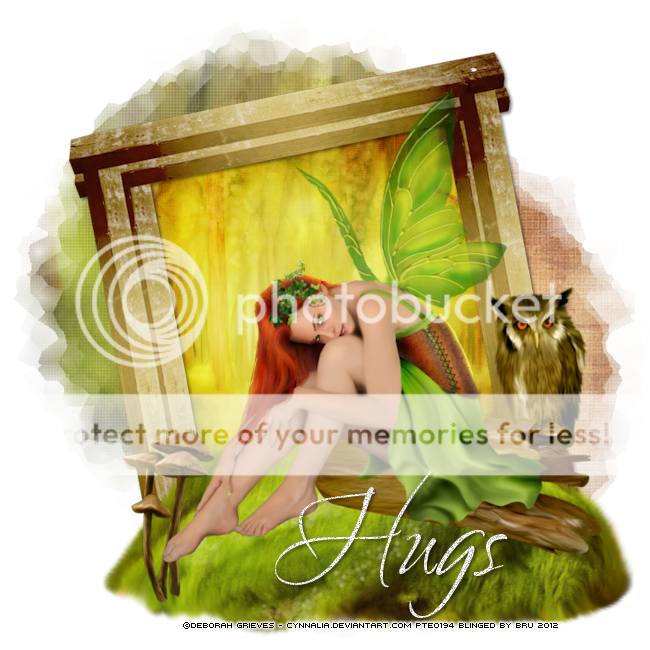
I have some new snags for you today using a gorgeous tube by Deborah Grieves available at PSP Tubes Emporium.
I used a gorgeous FTU kit by Wicked Princess Scraps called It's a Beautiful Life which you can download HERE
*Click the tags for full view*


Sunday, March 11, 2012
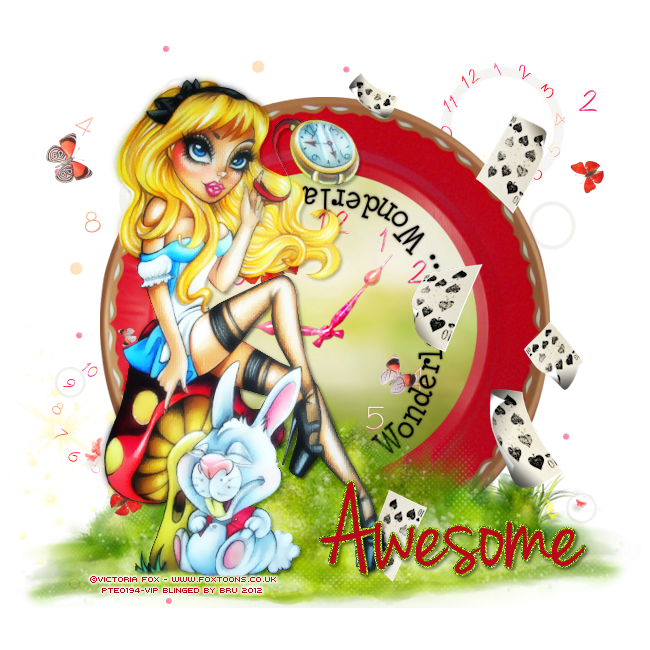
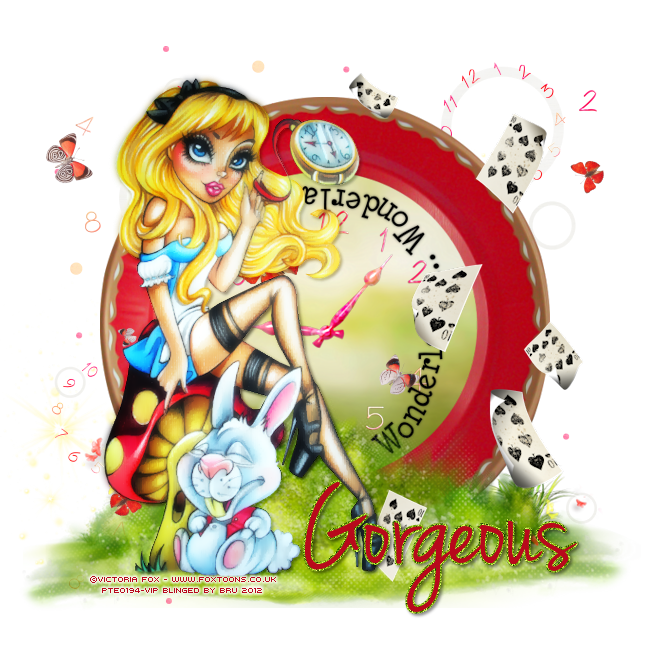
Wonderland Snags!
I have some new snags for you!
These snags use the awesome art of Victoria Fox which you can purchase at PSP Tubes Emporium and a gorgeous PTU scrap kit by Wicked Princess Scraps called Mad As a Hatter.
Enjoy!
*click the tag to see full size view*

Monday, November 7, 2011
Secret Garden

*Click the tag for full view*
This tutorial was written by Brunette on November 7th 2011.
Any similarity to any other tutorial is purely coincidental.
Do not copy and paste my tutorials or claim as your own you may link to them for group challenges.
What you'll need:
You'll need a tube of choice I am using the gorgeous art of Alena Lazareva. You can purchase her art for signature tags at Up Your Art HERE.
Be sure to check out all the other great artists there!
Fonts of choice - I am using a pixel font for the copyright and Jenna Sue for the name.
A gorgeous FTU kit by Wicked Princess Scraps which you can download as an exclusive kit on facebook for the AOG page HERE.
You can find more info about this page and what it is about HERE
Eye Candy 4000 - Gradient Glow
Ready?
Let's get started!
Open up a new 700x700 transparent canvas I always crop it later so it will be smaller I just like enough room to work.
Open up the circle scalloped Frame copy and paste it as a new layer onto your canvas. Now take your magic wand and click INSIDE the frame then to go selections-modify-expand by 3 now open up a paper of choice I used paper 11 from the kit. Copy and paste that as a new layer re-sizing it so it fits nicely then to go selections-invert and hit delete. Move this layer BELOW the frame if its not already there.
Now we're going to open up the wooden trunk from the kit, copy and paste that as a new layer ABOVE the frame layer. Re-size it a little to fit nicely then open up your tube copy and paste it as a new layer over the wooden trunk. Duplicate the tube layer then go to Adjust-Blur-Gaussian blur set to 3 then change the blend mode of this layer to soft light and lower the opacity a little.
Next I copied and pasted the grass and tree1 onto my canvas re-sized them a little and placed them where they looked best. With the tube I am using it comes with extra layers, I used one of the layers that had leaves and pasted it below everything BUT the frame. I think that gave it a nice touch.
Now we're going to add your name in a font of choice make sure to use a light color I used pink. I added some noise to do that go to Adjust-add/remove noise-add noise - uniform and monochrome checked -noise at 50 percent. Then add a gradient glow settings I used shown in the screen-shot below. Add a drop shadow I used H 2, V 2, Opacity 45, Blur 4 then changed the blend mode to Luminance L.


Finally add your copyright and license number if applicable save as png or jpeg whichever you prefer and we're done!
I hope you enjoyed this tutorial and found it easy to follow.
I would LOVE to see your results to any tutorials that you do, you can email results to me or post them on my page on facebook if you have a facebook account.
Subscribe to:
Posts (Atom)


