


Showing posts with label PurplesKreationz. Show all posts
Showing posts with label PurplesKreationz. Show all posts
Wednesday, February 20, 2013
F*ck Love!

*Click the tag for full view*
This tutorial was written by Brunette on February 20th 2013.
Any similarity to any other tutorial is purely coincidental.
Do not copy and paste my tutorials or claim as your own you may link to them for group challenges.
What you'll need:
You'll need a tube of choice I am using a gorgeous tube by Freya Langford-Sidebottom. Which you can purchase at Artistically Inclined Licensing HERE.
A gorgeous PTU kit by Purple's Kreationz called Stupid Cupid which you can find purchase at Artistically Inclined Licensing HERE.
Mura's Meister - Copies
Mask of choice
Fonts of choice - I am using a pixel font for the copyright and Jellyka Delicious Cakefor the name.
Ready?
Let's get started!
Open a new canvas 650 x 250.
Copy and paste your tube as a new layer arrange it to your liking on your canvas duplicate it and do the same. Continue until the canvas is covered then merge them together. Gray scale your layer then duplicate it and change the blend mode to soft light. Open up paper one from the kit copy and paste it as a new layer and move it below the original tube layer and change the blend mode of that tube layer to Luminance L.
Now open up paper 3 copy and paste it over the top tube layer and change the blend mode to soft light.
Open up the metal heart and the broken heart elements copy and paste them as new layers re-size them to your liking as well as arrange them to your liking. Then change the blend mode to screen for the broken heart element and Luminance L for the metal heart. Open up the skulls element re-size them to your liking and place them to either side of the bottom of the tag duplicate and mirror.
Copy and paste your main tube as a new layer arrange it to your liking then duplicate and go to adjust-blur-gaussian blur set to 3 and change the blend mode to soft light.
Now in a pixel font type out words I used F*ck love! for mine then center it in the canvas by going to objects-align-center in canvas then convert to raster. Now go to Mura's Meister copies and use my settings shown in the screen-shot below. Then apply a mask of choice and merge group. Change the blend mode to softlight and move it so its inbetween the tube layers that cover the canvas then duplicate it.

Now we're going to do the borders. Go to the very bottom layer of your canvas it should be blank click it then go to selections-modify-contract by 4 then invert add a new layer flood fill with a color of choice then add some noise if you like. Arrange this layer so its at the top of your layers. Repeat these steps but change the number you contract by to 2. Add a drop shadow to the first border layer I used H 0 V 0 Opacity 50 Blur 5.00 Color black.
Now in a font and color of choice add your name in a color of choice then go to selections-select all-float-defloat-modify and expand by 2 then add a new layer and flood fill with a color of choice then go to selections-modify and expand by 2 again add a new layer and flood fill with the same color you typed out your name in. Arrange that layer below everything other font layer and add a drop shadow I used H 1 V 1 Opacity 50 Blur 5.00 Color Black.
Now for the avatar all I did was open up a new canvas 150x150 closed off the border layers and copyright layers on my banner then copy merged and pasted it as a new layer on the 150x150 canvas. Arrange it to your liking even re-size it a little if you want. Then again go to the bottom layer then go to selections-modify-contract by 5 then invert add a new layer and flood fill with the same color as you did on the banner. Arrange this layer so its at the top of your layers. Repeat these steps but change the number you contract by to 2. Add a drop shadow to the first border layer I used H 0 V 0 Opacity 50 Blur 5.00 Color black.
Of course add your name or the first letter of your name it your full name won't fit then be sure to add your copyright info to your avatar as well.
I hope you enjoyed this tutorial and found it easy to follow.
I would LOVE to see your results to any tutorials that you do, you can email results to me or post them on my page on facebook if you have a facebook account.
Sunday, August 26, 2012
Gothic

*Click the tag for full view*
This tutorial was written by Brunette on August 26th 2012.
Any similarity to any other tutorial is purely coincidental.
Do not copy and paste my tutorials or claim as your own you may link to them for group challenges.
What you'll need:
You'll need a tube of choice I am using an awesome tube by Jose Cano. I bought this tube at PTE which has now closed
You can now purchase his art at Scraps and the City.
FTU Scrap Kit by Purples Kreations from Pink Candy Designs called "Goth Girl"
You an download this awesome kit HERE.
Mask from HERE I used number 218 they're downloadable in packs.
Don't forget to leave a thank you when downloading!
Fonts of choice - I am using a pixel font for the copyright and Weimar for the name.
Ready?
Let's get started!
Open up a 700x700 canvas we can always re-size/crop later.
I like my tags BIG LOL.
Open up frame 4 take your magic wand and click inside the frame. Go to selections-modify and expand by 3. Open up a paper of choice I used paper 7 copy and paste it as a new layer then go to selections-invert and hit delete. DO NOT deselect yet. Open a different paper I used paper 4 hit delete again. Now we're going to copy and paste your tube and do the same but move it between the two paper layers. Duplicate and mirror it. Change the blend mode to screen for the top paper layer and your tube layer. I also added the lights element from the kit in there re-sized it so it fit nicely.
Copy and paste your tube, arrange it to your liking.
Open up a ribbon I used number 6, a cupcake I used number 2, a singlerose I used number 1 and skull 4 .Copy and paste your cupcake re-size it so it fits nicely now your rose do the same thing. The ribbon copy and paste it but move it below the cupcake and rose. Move the skull where you like on the frame and re-size it a little.
Open up another paper copy and paste it as a new layer, move it below everything and add your mask then merge group.
Open up the wire element I used number 1 copy and paste it arrange it so its showing at the top duplicate mirror and flip it.
Open up the star cluster element I used number 1 copy and paste it as a new layer duplicate and mirror.
Now you can go through and give everything a drop shadow of
H 2
V 2
Opacity 60
Blur 4.00
Color Black
Now in a font and color of choice add your name now go to selections-select all-float-defloat-modify-expand by 2 add a new layer and flood fill with a color of choice then modify it again by 2 add a new layer and flood fill with the original color of the font arrange it to the bottom of the other font layers. Add your drop shadow to the bottom layer. You can add some noise to the middle layer if you like, its up to you.
Finally add your copyright and license number if applicable save as png or jpeg whichever you prefer and we're done!
I hope you enjoyed this tutorial and found it easy to follow.
I would LOVE to see your results to any tutorials that you do, you can email results to me or post them on my page on face-book if you have a face-book account.
Wednesday, August 8, 2012
Rockattude
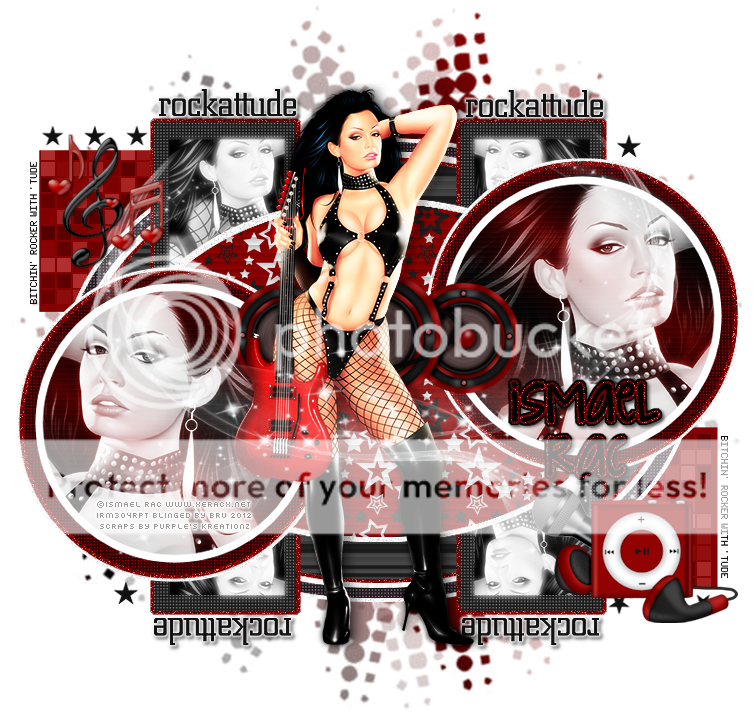
*Click the tag for full view*
This tutorial was written by Brunette on August 8th 2012.
Any similarity to any other tutorial is purely coincidental.
Do not copy and paste my tutorials or claim as your own you may link to them for group challenges.
What you'll need:
You'll need a tube of choice I am using a gorgeous tube by Ismael Rac which you can purchase at his store HERE.
Be sure to check out all his other great tubes while you're there!
A badass kit called Heavy Metal Lover by Purple Kreationz which you can purchase HERE.
Be sure to check out ALL her other awesome kits!
Fonts of choice - I am using a pixel font for the copyright and KG Strawberry Limeade for the name.
Tag Template by Eye Candii Graphicz HERE.
Make sure you leave some love when you download!
Mask of choice - mine is by Vix PSP HERE.
I used mask number 147 :) which is in the 10th May 2008 post
Make sure you leave some love when you download!
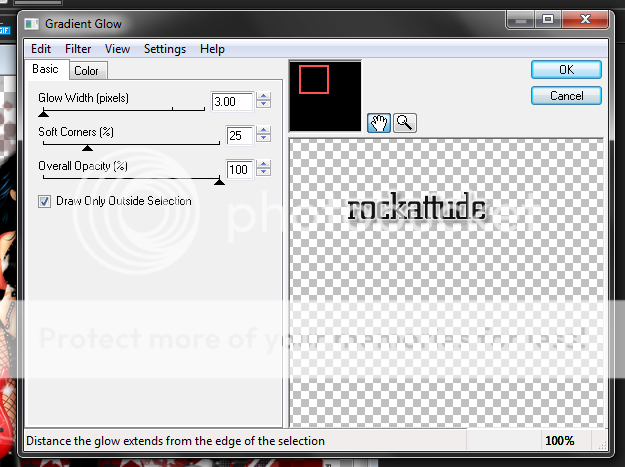
Eye Candy 4000 - Gradient Glow
Xero - Fritillary
Ready?
Let's get started!
Open up the template Shift+D to duplicate the whole thing now close out the original.
We're working our way from the bottom up on the template.
On the left back pink rectangle layer go to selections-select all-float-defloat add a new layer and flood fill with a color of choice I used red then apply your Xero Fritillary just hit random a few times to get one you like. Repeat these steps for the right back pink rectangle layer. Close off the original layers.
On the oval pink noisy layer go to selections-select all-float-defloat add a new layer and flood fill with a color of choice again I used red then added some noise adjust-add/remove noise-add noise my settings are Random checked, Monochrome checked and at 36%. Close off the original layers.
On the oval gray layer to go selections-select all-float-defloat add a new layer now open up a paper of choice I used paper 13 from the kit copy and paste it as a new layer then go to selections-invert and hit delete. Now change the blend mode to Luminance.
On the left pink rectangle layer go to selections-select all-float-defloat add a new layer and flood fill with a color of choice again I used red then added some noise adjust-add/remove noise-add noise my settings are Random checked, Monochrome checked and at 36%. Repeat these steps for the right pink rectangle. Close off the original layers.
On the black dotted left and right rectangles go to Adjust-Hue and Saturation-Colorize and change them so they're both at zero.
On the black left rectangle go to selections-select all-float-defloat now open up your tube copy and paste it as a new layer duplicate it and flip it. Erase the the parts the overlap the top and bottom. Change the blend mode to Luminance L duplicate it and change the blend mode to screen and add a guassian blur of 3 this is under the adjust in psp. Repeat these steps for the right black rectangle.
On the pink oval layer go to selections-select all-float-defloat now open up another paper of choice I used paper 8 from the kit copy and paste it as a new layer then go to selections-invert and hit delete. Close off the original layer.
For the left and right noisy pink circle layers go to selections-select all-float-defloat add a new layer and flood fill them with a color of choice I used red then added noise same settings as earlier. Do this for BOTH layers. Close off the original layers.
On the left and right black dotted circles go to Adjust-Hue and Saturation-Colorize and change the colors so they're red.
On the gradient circle layers go to selections-select all-float-defloat add a new layer and flood fill with a gradient or color of choice. I used a foreground/backgroud gradient. DO NOT deselect yet copy and paste your tube (a close up if you have one) arrange it to your liking in the circle then go to selections-invert and hit delete. Change the blend mode of these layers to screen duplicate it and change the blend mode to overlay and add a guassian blur of 3 this is under the adjust in psp. Then add some lines on the top tube layer I used Blinds in PSP go to Effects-Texture Effects-Blinds with these settings Width 5, Opacity 12, Color White, Horizontal and Light from left/top checked.
I closed off the white and black rectangle layers.
On the rockattude word-art add a light gradient glow my settings shown in the screen shot below.

Copy and paste your tube as a new layer duplicate it and change the blend mode to overlay and add a guassian blur of 3 this is under the adjust in psp.
Now we're going to decorate!
Open up the microphone, Ipod, Light Swish, Music Notes and speakers.
Copy and paste the speakers so they're behind your tube re-size them so they fit nicely between the two circles and kind of look like they're holding them together.
The Ipod and Mic can go near the bottom right of the tag re-size them so they fit nicely and make sure the mic is behind the Ipod.
The Music notes I placed them in the top left of course re-sizing them to fit nicely.
The light swish copy and paste it so its over the tube re-size it a little if need be then duplicate it and move it below the tube.
Add a new layer and flood fill with your color or gradient from earlier and apply your mask then merge group.
Add your name in your font and color of choice then go to selections-select all-float-defloat-modify and expand by 2 add a new layer flood fill it with white or a color of choice then add some noise by going to adjust-add/remove noise-add noise uniform checked, 50% noise and monochrome checked. DO NOT deslect yet go to modify and expand by 2 again add a new layer and flood fill with the color you used for your name move it below all the name layers and add a drop shadow.
Here are the settings I used
H 2
V 2
Opacity 60
Blur 4.00
Color Black
Finally add your copyright and license number if applicable save as png or jpeg whichever you prefer and we're done!
I hope you enjoyed this tutorial and found it easy to follow.
I would LOVE to see your results to any tutorials that you do, you can email results to me or post them on my page on face-book if you have a face-book account.
Subscribe to:
Posts (Atom)


