


Tuesday, May 3, 2011
Quit Hatin'

*Click the tag for a bigger view*
This tutorial was written by Brunette on May 3rd 2011.
Any similarity to any other tutorial is purely coincidental.
Do not copy and paste my tutorials or claim as your own you may link to them for group challenges.
You'll need a tube of choice I am using the gorgeous art of Steve Baier. You can purchase his art for signature tags at Up Your Art.
While you're there be sure to check out all the other GREAT artists there!
Fonts of choice - I am using Krupke and pixel font for the copyright.
Eye Candy 4000 - Gradient Glow
A kit of choice I am using a awesome kit by Angel's Designz called Hatin Bitches. You can get this kit over at Twilight scraps here.
While you're there why not check out all their awesome stuff!
Ready?
Let's get started!
Open up the template shift + D duplicates the whole thing then close out the original.
Ready?
Let's get started!
Open up the template shift + D duplicates the whole thing then close out the original.
On the Dk Circle layer selections-select all-float-defloat now open up a paper of choice I used paper 7 from the kit copy and paste it as a new layer then go to selections-invert and hit delete. Select none and close off the original Dk circle layer.
On the pink rectangle layer selections-select all-float-defloat add a new layer and flood fill with a color of choice. Select none and close off the original pink rectangle layer. Repeat these steps for the Grey oval layer, pink mini circle layer and white rectangle layer.
I also closed off the grey strip layer.
On the Pink Circle layer selections-select all-float-defloat copy and paste a paper of choice I used paper 7 again then go to selections-invert and hit delete. Select none and close off the original pink circle layer.
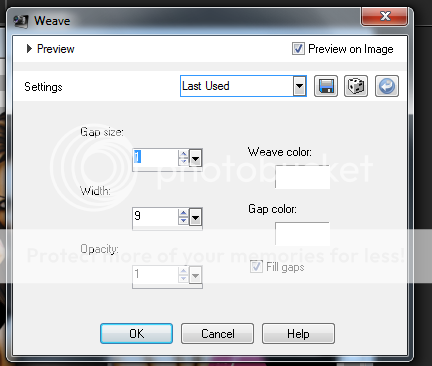
On the Black circle layer selections-select all-float-defloat add a new layer flood fill with a color of choice then I added some weave to it you can find the weave settings in my screen-shot below the actual tool is under effects-texture effects. Just change the color to a color to match your tag.
I merged the two little hearts on each side of the template then went to selections-select all-float-defloat add a new layer and flood fill with a color of choice.
Copy and paste your tube duplicate it then go to adjust-blur-gaussian blur set to 3 then change the blend mode to soft light. Add a drop shadow to your original tube layer.
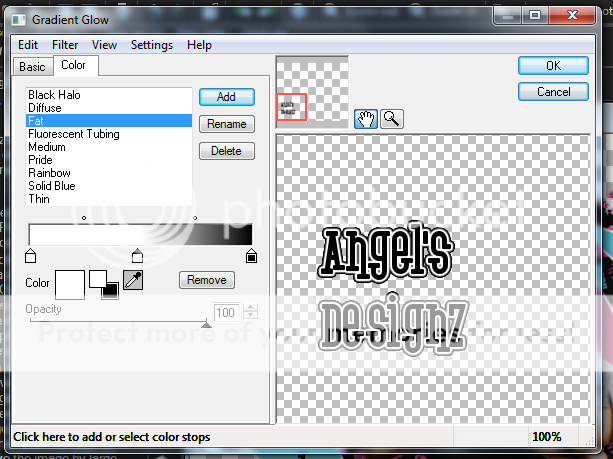
I added a gradient glow setting to the black circle layer we flood filled, the pink circle layer we copied and pasted a paper on and the grey oval we flood filled. Then add a drop shadow to each of these layers.


I used the wordart sticker on the bottom of the tag re-size it so it fits nicely also I used the backing element from the kit I rotated it 90 degrees to the left. Arrange it to you liking making sure its at the BOTTOM of the layer palette duplicate it and then mirror it.
Add your name in a font of choice then add a gradient glow to it along with a drop shadow. Settings shown in the screen-shot below. I did use the same drop shadow throughout the tutorial so this screen-shot works for anywhere I said to add one to.


Finally add your copyright and license number if applicable save as png or jpeg whichever you prefer and we're done!
I hope you enjoyed this tutorial and found it easy to follow.
Subscribe to:
Posts (Atom)


