


Sunday, July 31, 2011
Where the Boat leaves From

*Click the tag for full view*
This tutorial was written by Brunette on July 31st 2011.
Any similarity to any other tutorial is purely coincidental.
Do not copy and paste my tutorials or claim as your own you may link to them for group challenges.
What you'll need:
You'll need a tube of choice I am using the gorgeous art of Elias Chatzoudis. You can purchase his art for signature tags at PSP Tubes Emporium.
AND while you're there be sure to check out the other awesome artists there!
Fonts of choice
Eye Candy - Gradient Glow
Template by Melissa V over at the Creative Misfits blog here.
A kit of choice I am using a gorgeous kit called Where the Boat Leaves From by Grunge and Glitter. You can find this kit over at Digital Chaos or Twilight Scraps.
Ready?
Let's get started!
Open up the template shift+D to duplicate it then close off the original.
I closed off the white background layer and the right circle layer.
On the back rectangle layer selections-select all-float-defloat open up paper 6 from the kit re-size it fits nicely then go to selections-invert and hit delete. Close off the original rectangle layer.
Open up paper 8 from the kit move it below the rectangle layer and use your eraser tool to erase it so it only shows along the bottom. Play around make it so it sorta looks like on a beach.
Open the netting from the kit copy and paste it as a new layer make sure its below the 3 square layers and resize it so it fits nicely.
On the left square layer take your magic wand and select the gray area then go to selections-modify-expand by 2 open up one of the scene showing papers I used papers 11,12 and 13. Add a new layer then copy and paste one of these layers INTO the selections then select none. Repeat these steps for the other two square layers.
Open up the palm tree from the kit copy and paste it as a new layer re-size it so it fits nicely use your eraser tool to delete the bottom part of the palm tree leaving the leaves of it hanging over the rectangle layers.
I took the rope from the kit copied and pasted it as a new layer re-sized it a little and moved it below the square layers and the palm tree deleted with my eraser tool what overhanged a little.
I also used the bird and the coconuts from the kit re-sizing them so they fit nicely arrange them to your liking.
Open up your tube copy and paste it as a new layer then duplicate it go to adjust-Blur-Gaussin Blur- settings at 3 then change the blend mode to overlay and add a drop shadow to the original tube layer.
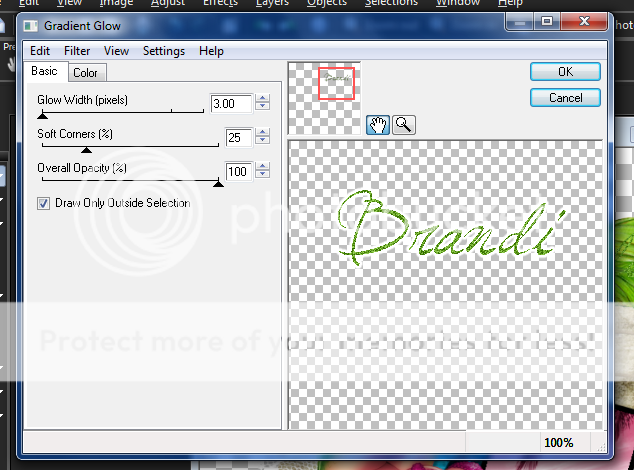
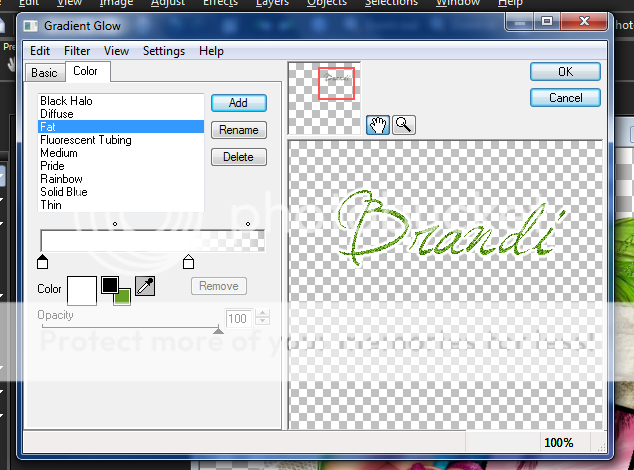
In your font of choice add your name in a color that matches your tag I used green. Then added some noise, a gradient glow and a dropshadow settings for these are in the screen-shots below. I moved mine in the palm tree and changed the blend mode to Luminance L.


Finally add your copyright and license number if applicable save as png or jpeg whichever you prefer and we're done!
I hope you enjoyed this tutorial and found it easy to follow.
Subscribe to:
Post Comments (Atom)


0 comments:
Post a Comment